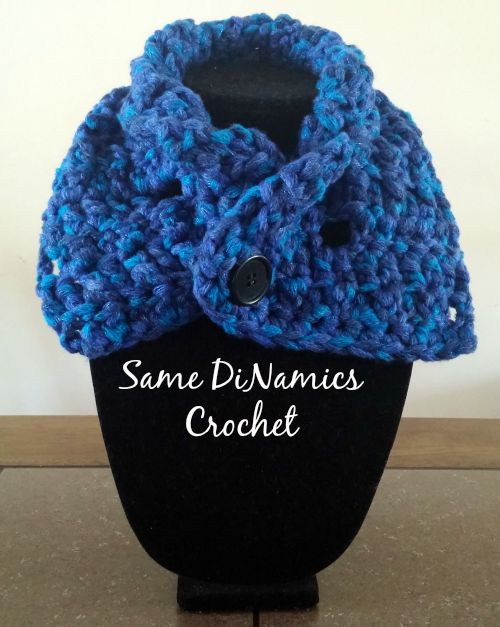
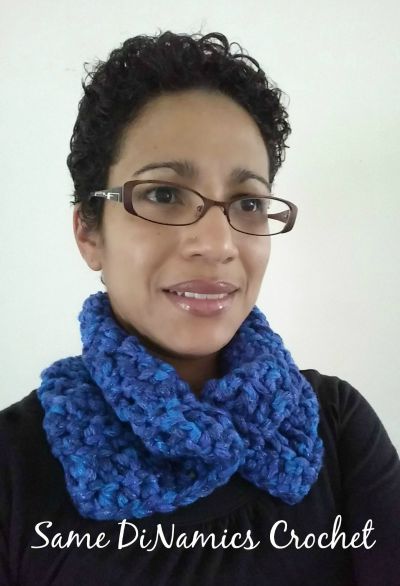
Aeris Buttoned Cowl Free Crochet Pattern

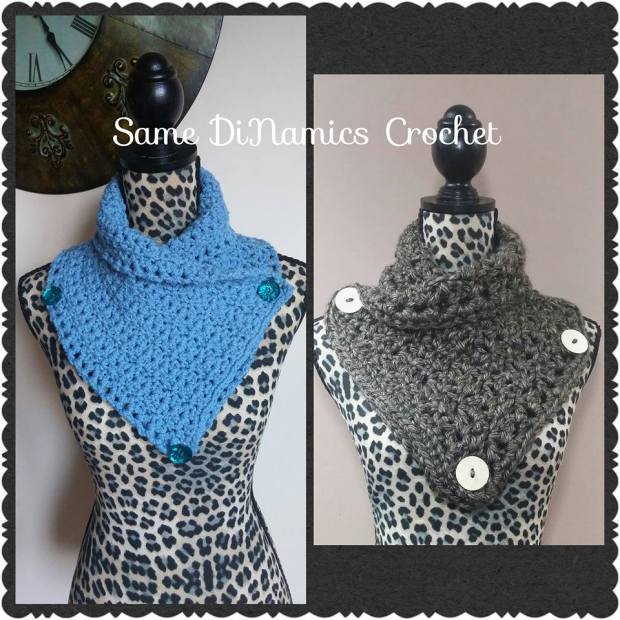
The Aeris Buttoned Cowl will keep your neck toasty and stylish this winter. It’s a splendid cowl that will add a sense of style and elegance to your outfit. It’s a wonderful cowl to wear under a coat that has no hood all the while offering the back of your neck supreme protection against the cold; especially if you have short hair like I do. The “V” pointed shape at the front is achieved by the placement of the buttons. Whether your coat closes all the way to the top or just halfway, the Aeris Buttoned Cowl will look fantastic!

I made this cowl using two different types of yarn, bulky weight and worsted weight, to offer you the autonomy to choose colors and styles to make your very own Aeris Buttoned Cowl.

*Disclaimer: This post contains affiliate links. 

Aeris Buttoned Cowl

Add Me to Your Ravelry Favorites Button

Lion Brand Hometown USA Yarn


I want to thank Stacey of OFF THE HOOK CROCHET CREATIONS BY STACEY for testing this pattern for me.

Aeris Buttoned Cowl


Pin me for later button


Pattern Button


Aeris Buttoned Cowl – Bulky Yarn Version

Yarn/Hook/Notions

  • 3 skeins of Lion Brand Hometown USA, Tweeds, #6 Bulky Weight, 64 yards per skein, 192 yards total
  • 9mm hook
  • 3 buttons: size 35mm, 1 3/8”; needles for weaving in ends

Size
Cowl measures approximately 32” L x 11” W, width is measured at the center of the cowl

Gauge
Gauge is not important; however this is an approximate gauge – 5 V-St rows = 4”

Experience Level
Easy

Stitch Abbreviation
Ch – chain; st(s) – stitch(es); sk – skip; sp(s) – space(s); sl st – slip stitch; sc – single crochet; dc – double crochet; V-st – v-stitch (see special stitches used)

Special Stitches Used:
FSC – foundation single crochet: ch2, (does not count as st), insert hook into first ch, yo, pull up loop (2 loops on hook), yo, pull through one loop (2 loops on hook), yo, pull through both loops, one FSC made.

V-st – dc, ch1, dc in indicated stitch or space

Pattern Notes:

  • Ch4 will count as a dc and ch1, the beginning of a V-st.
  • When turning, do not chain up, simply turn and sl st into the ch1 space to begin the V-st, which is the Ch4.
  • Mark the FSC as the right side of the cowl.

Pattern Instructions

FSC – 31, turn
Row 1: ch4, dc in same st, [sk2 sts, sc in next, sk2 sts, V-st in next] 5x, turn < 6 V-st; 5 sc>
Row 2: sl st to ch1 sp, ch4, dc in same ch1 sp, [sc in next sc, V-st in next V-st] 5x, turn <6 V-sts; 5 sc>
Rows 3-37: Repeat row 2
Row 38: ch1, 1 sc in same st, 1 sc in each st across <23 sc>. DO NOT FASTEN OFF.

Move on to finishing.

Finishing

You will now work evenly spaced sc stitches around the cowl. I placed 2 sc in each post of the dc sts on both sides; and placed 1 sc in each st in the bottom (the initial FSC). As long as you have an even look to the border of the cowl, the stitch border count is not relevant.

To add buttons, lay the cowl flat with the right side up (the FSC is considered the bottom of the cowl; and the top of the cowl is where you fastened off) and place marker at each top corner of the cowl. Measure 10” from the top right corner and place marker. This will allow you to know where to attach the buttons. Once you have done that, you can now attach your buttons. Attaching the buttons is sort of tricky because there are holes created by the sc border. Try to find a spot where you can safely attach the buttons.

See pictures at the end for more clarifications. Note: Picture of button placement will be the same for both the bulky and worsted weight versions. It’s just for clarification purposes on where to place the buttons.


Aeris Buttoned Cowl – Worsted Weight Version

Yarn/Hook/Notions

  • 192 yards of Red Heart with Love, Solids, #4 Worsted Weight (about ½ of a skein)
  • J/6mm hook
  • 3 buttons: size 25mm/1”; needles for weaving in ends

Size
Cowl measures approximately 30” L x 9” W, width is measured at the center of the cowl

Gauge
Gauge is not important; however this is an approximate gauge – 8 V-st rows = 4”

Experience Level
Easy

Stitch Abbreviation
Ch – chain; st(s) – stitch(es); sk – skip; sp(s) – space(s); sl st – slip stitch; sc – single crochet; dc – double crochet; V-st – v-stitch (see special stitches used)

Special Stitches Used:
FSC – foundation single crochet: ch2, (does not count as st), insert hook into first ch, yo, pull up loop (2 loops on hook), yo, pull through one loop (2 loops on hook), yo, pull through both loops, one FSC made.

V-st – dc, ch1, dc in indicated stitch or space

Pattern Notes:

  • Ch4 will count as a dc and ch1, the beginning of a V-st.
  • When turning, do not chain up, simply turn and sl st into the ch1 space to begin the V-st, which is the Ch4.
  • Mark the FSC as the right side of the cowl.

Pattern Instructions

FSC – 43, turn
Row 1: ch4, dc in same st, [sk2 sts, sc in next, sk2 sts, V-st in next] 7x, turn < 8 V-st; 7 sc>
Row 2: sl st to ch1 sp, ch4, dc in same ch1 sp, [sc in next sc, V-st in next V-st] 7x, turn <8 V-sts; 7 sc>
Rows 3-60: Repeat row
Row 61: ch1, 1 sc in same st, 1 sc in each st across <31 sc>. DO NOT FASTEN OFF.

Move on to finishing.

Finishing

You will now work evenly spaced sc stitches around the cowl. I placed 2 sc in each post of the dc sts on both sides; and placed 1 sc in each st in the bottom (the initial FSC). As long as you have an even look to the border of the cowl, the stitch border count is not relevant.

Photo Tutorial Section

 To add buttons, lay the cowl flat with the right side up (the FSC is considered the bottom of the cowl; and the top of the cowl is where you fastened off) and place marker at each top corner of the cowl. Measure 10” from the top right corner and place marker. This will allow you to know where to attach the buttons. Once you have done that, you can now attach your buttons. Attaching the buttons is sort of tricky because there are holes created by the sc border. Try to find a spot where you can safely attach the buttons. While I do give you a set of measurements, the important thing to remember is that you place your marker/buttons where it is comfortable for you. This is just a guide.
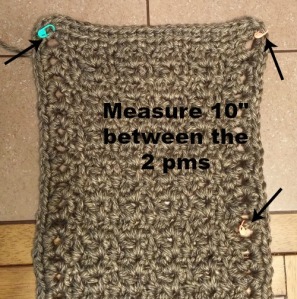
This pic shows where to place your markers for the buttons. You can play around with it by sizing it to you. This is just a guide.
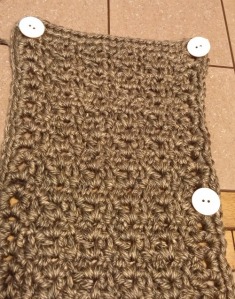
Aeris Buttoned Cowl with button placement

Where buttons go.

Aeris Collage

Buy Me Button

Copyright © 2016 Same DiNamics Crochet
diannevhunt@gmail.com
Same DiNamics Crochet
This pattern is to not be redistributed or sold.
The finished item may be sold or given away as a gift.

Candy Stripes Cowl Free Crochet Pattern

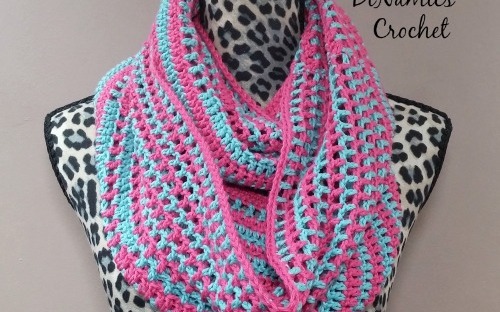
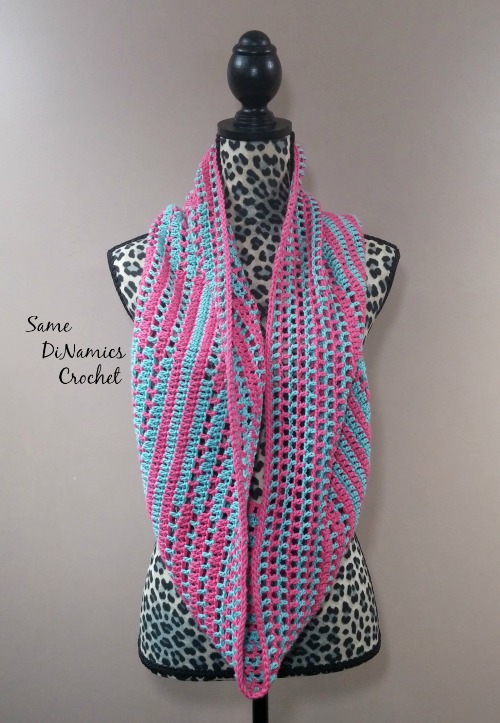
This Candy Stripes Cowl is such a fun cowl to make. This is one of the reasons why I am in love with this cowl. I love how the colors trick the eye making this piece look like stripes in colorful candy. The use of stitches make this piece a simple yet complex looking piece. This cowl can be used as a long accent piece to your wardrobe or can be doubled for warmth.


Candy Stripes Cowl Teaser Collage

Add Me to Your Ravelry Favorites Button
Candy Stripes Cowl Pink and Green Long

Want a PDF print version of this pattern? You can now get it for a small fee. Why a fee? While I want to provide as many free patterns for you as possible (I will have some paid patterns here and there), I’d also like to monetize my blog (I’m being honest here) and thus creating a small income for myself so that I can continue providing more free patterns.

I want to thank the ladies who tested this pattern for me!

Pattern Button

Yarn/Hook/Notions

  • KnitPicks Comfy Sports #2, sports weight, 75% Pima Cotton, 25% Acrylic, 136 yards per ball, 4 balls used Colors Used: 2 balls of Zinnia – 272 yards (CA); 2 balls of Sea Foam – 272 yards (CB)
  • 5mm hook
  • Needle for weaving in ends.

Sizing
Cowl measures: Approximately 28” x 11”

Gauge
16dc sts = 4”; 8 ½ dc rows = 4”

Stitch Abbreviation
ch – chain; st(s) – stitch(es); sp(s) – space(s); sk – skip; dc – double crochet; sc – single crochet; rep – repeat; Rnd – round

Special Stitches Used
FSC – ch2, (does not count as st), insert hook into first ch, yo, pull up loop (2 loops on hook), yo, pull through one loop (2 loops on hook), yo, pull through both loops, one FSC made.

Experience Level
Easy

Pattern Notes

  • Chain 3 at the beginning of each round does NOT equal a stitch.
  • From rounds 1 -11, join with a slipstitch to 1st stitch (DC) of each round skipping over the chain 3.
  • Instructions in brackets [] are to be repeated the amount of times indicated after the brackets, i.e. [1dc in ch1 sp, 1dc in next st]. 10x means repeat those instructions 10 times.
  • From round 12 and on, you will do a chain 4 keeping in mind that the ch3 is not a stitch; the extra chain will count as a chain space. From here on out, join at the 3rd chain of the ch3.
  • Alternate colors with every row. CA is 1st color; CB is 2nd color. Change colors when joining rows.

Candy Stripes Cowl

Pin me for later button

Pattern Instructions
Please read pattern notes before starting.
With CA, FSC – 220, join

Rnd 1 – With CB, ch3, dc in same st, dc in next 19 sts, *[ch1, sk1 st, dc in next st] 10x, 1dc in next 20sts* rep from * to * around, join
Rnd 2 – With CA, ch3, dc in same st, dc in next 19 sts, *[1dc in ch1 sp, 1dc in next st] 10x, [ch1, sk1 st, dc in next st] 10x* rep from * to * 5x, join
Rnd 3 – With CB, ch3, dc in same st, dc in next 39 sts, *[1dc in ch1 sp, 1dc in next st] 10x, [ch1, sk1 st, dc in next st] 10x* rep from * to * 4x, [1dc in ch1 sp, 1dc in next st] 10x, join
Rnd 4 – With CA, ch3, dc in same st, dc in next 59 sts, *[1dc in ch1 sp, 1dc in next st] 10x, [ch1, sk1 st, dc in next st] 10x* rep from * to * 4x, join
Rnd 5 – With CB, ch3, dc in same st, dc in next 79 sts, *[1dc in ch1 sp, 1dc in next st] 10x, [ch1, sk1 st, dc in next st] 10x* rep from * to * 3x, [1dc in ch1 sp, 1dc in next st] 10x, join
Rnd 6 – With CA, ch3, dc in same st, dc in next 99 sts, *[1dc in ch1 sp, 1dc in next st] 10x, [ch1, sk1 st, dc in next st] 10x* rep from * to * 3x, join
Rnd 7 – With CB, ch3, dc in same st, dc in next 119 sts, *[1dc in ch1 sp, 1dc in next st] 10x, [ch1, sk1 st, dc in next st] 10x* rep from * to * 2x, [1dc in ch1 sp, 1dc in next st] 10x, join
Rnd 8 – With CA, ch3, dc in same st, dc in next 139 sts, *[1dc in ch1 sp, 1dc in next st] 10x, [ch1, sk1 st, dc in next st] 10x* rep from * to * 2x, join
Rnd 9 – With CB, ch3, dc in same st, dc in next 159 sts, *[1dc in ch1 sp, 1dc in next st] 10x, [ch1, sk1 st, dc in next st] 10x* rep from * to * 1x, [1dc in ch1 sp, 1dc in next st] 10x, join
Rnd 10 – With CA, ch3, dc in same st, dc in next 179 sts, *[1dc in ch1 sp, 1dc in next st] 10x, [ch1, sk1 st, dc in next st] 10x* rep from * to * 1x, join
Rnd 11 – With CB, ch3, dc in same st, dc in next 199 sts, *[1dc in ch1 sp, 1dc in next st] 10x, join
Rnd 12 – With CA, ch4, sk1 st, dc in next st, [ch1, sk1 st, dc in next st] 9x *dc in next 20sts, [ch1, sk1 st, dc in next st] 10x* rep from * to * 5x, join
Rnd 13 – With CB, ch4, sk1 sp, dc in next st, [ch1, sk1 sp, dc in next st] 19x *[dc in ch1 sp, dc in next st] 10x, [ch1, sk1 st, dc in next st] 10x* rep from * to * 4x, (dc in ch1 sp, dc in next] 10x, join
Rnd 14 – With CA, ch4, sk1 sp, dc in next st, [ch1, sk1 sp, dc in next st] 29x *[dc in ch1 sp, dc in next st] 10x, [ch1, sk1 st, dc in next st] 10x* rep from * to * 4x, join
Rnd 15 – With CB, ch4, sk1 sp, dc in next st, [ch1, sk1 sp, dc in next st] 39x *[dc in ch1 sp, dc in next st] 10x, [ch1, sk1 st, dc in next st] 10x* rep from * to * 3x, (dc in ch1 sp, dc in next] 10x, join
Rnd 16 – With CA, ch4, sk1 sp, dc in next st, [ch1, sk1 sp, dc in next st] 49x *[dc in ch1 sp, dc in next st] 10x, [ch1, sk1 st, dc in next st] 10x* rep from * to * 3x, join
Rnd 17 – With CB, ch4, sk1 sp, dc in next st, [ch1, sk1 sp, dc in next st] 59x *[dc in ch1 sp, dc in next st] 10x, [ch1, sk1 st, dc in next st] 10x* rep from * to * 2x, (dc in ch1 sp, dc in next] 10x, join
Rnd 18 – With CA, ch4, sk1 sp, dc in next st, [ch1, sk1 sp, dc in next st] 69x *[dc in ch1 sp, dc in next st] 10x, [ch1, sk1 st, dc in next st] 10x* rep from * to * 2x, join
Rnd 19 – With CB, ch4, sk1 sp, dc in next st, [ch1, sk1 sp, dc in next st] 79x *[dc in ch1 sp, dc in next st] 10x, [ch1, sk1 st, dc in next st] 10x* rep from * to * 1x, (dc in ch1 sp, dc in next] 10x, join
Rnd 20 – With CA, ch4, sk1 sp, dc in next st, [ch1, sk1 sp, dc in next st] 89x *[dc in ch1 sp, dc in next st] 10x, [ch1, sk1 st, dc in next st] 10x* rep from * to * 1x, join
Rnd 21 – With CB, ch4, sk1 sp, dc in next st, [ch1, sk1 sp, dc in next st] 99x *[dc in ch1 sp, dc in next st] 10x, join
Rnd 22 – With CA, ch4, sk1 sp, dc in next st, [ch1, sk1 sp, dc in next st] 109x

Finishing
Rnd 23 – With CB, ch1, 1sc in each st and ch1 sps all around, join

Fasten off and weave in ends.

I hope that you have enjoyed this pattern. Please share your finished project with me on my page here

As always, much love and happy hooking!

Dianne

Copyright © 2016 Same DiNamics Crochet
diannevhunt@gmail.com
Same DiNamics Crochet
This pattern is to not be redistributed or sold.
The finished item may be sold or given away as a gift.

One Skein Wonder Neck Warmer Cowl Free Crochet Pattern

One Skein Wonder Neck cowl

This neck warmer is made using only one skein of yarn, making it quick and easy. It is also made in rows and then seamed in a tubular fashion. Allowing for the neck warmer to gather close to your neck for superior warmth. There’s no fussing with getting it to sit right, as it just drapes comfortably at the base of your neck.

This One Skein Wonder Neck Warmer/Cowl is my contribution to Cre8tion Crochet.

One Skein Wonder Collage

Add Me to Your Ravelry Favorites Button

Want a PDF print version of this pattern? You can now get it for a small fee. Why a fee? While I want to provide as many free patterns for you as possible (I will have some paid patterns here and there), I’d also like to monetize my blog (I’m being honest here) and thus creating a small income for myself so that I can continue providing more free patterns.

Pattern Button

Yarn/Hook/Notions:

  • Red Heart Stellar, #6 Super Bulky, 90 yds. Samples shown in colors: Quark and Star.
  • Hook: 10mm
  • Notions: Needles for weaving in ends

Sizing

  • When finished cowl will measure approximately 16” x 11” (when seamed together)
  • Gauge: 1dc row = 1 ¼”; 4dc stitches = 2 ¼”
  • Only one size for this pattern. Gauge is not important.

Stitch Abbreviation

Ch – chain; st(s) – stitch(es); sk – skip; sp(s) – space(s); sc – single crochet; dc – double crochet;

Experience Level

  • Easy/Beginner

Special Pattern Notes:

  • Chains at the beginning of each row will count as stitches.
  • Always place your last dc in 3rd chain of turning chain, which will be referred to as “last st” in directions.
  • You can make your neck warmer longer or shorter if you’d like; just make your last row ending with a row 3 or row 5.
  • This pattern is worked in rows not rounds. You will bring your sides together and seam it together to create a tubed neck warmer.

White One Skein Wonder Cowl 1

Pin me for later button

Pattern Instructions

Ch 41

Row 1: 1dc in 4th ch from hook, 1dc in next 4 sts, [ch3, sk 2sts, 1sc in next st, ch3, sk2sts, 1dc in next 6sts] 3x – mark this side of your work as right side, turn <24dc, 3sc, 6 ch3 sps>

Row 2: Ch8 (counts as 1dc plus 5chs, here and throughout), sk 4dc, 1dc in next st, [ch5, sk the “ch3, sc, ch3” sps, 1dc in next st, ch5, sk 4dc, 1dc in next st] 3x placing last dc in last st, turn <8dc, 7 ch5 sps>

Row 3: ch6 (counts as 1dc plus 3chs, here and throughout), [1sc in ch5 sp, ch3, 1dc in next st, 4dc in ch5 sp, 1 dc in next st, ch3] 3x, 1sc in ch5 sp, ch3, 1dc in last st, turn < 20dc, 4sc, 8 ch3 sps>

Row 4: ch8, sk the “ch3, sc, ch3” sps, [1dc in next dc, ch5, sk 4dc, 1dc in next st, ch5] 3x, 1dc in last st, turn <8dc, 7 ch5 sps >

Row 5: ch3 (counts as a dc), [4dc in ch5 sp, 1dc in next st, ch3, 1sc in ch5 sp, ch3, 1dc in next st] 3x, 4dc in ch8 sp, 1dc in last st <24dc, 3sc, 6 ch3 sp>

Rows 6-13: repeat rows 2-5

Green One Skein Wonder Side

Finishing Notes:

Fasten off leaving long tail, about a yard. Bring sides of neck warmer together (left side to the right side). Using a whipstitch, seam sides together all the way till end. Weave in ends. Turn work right side out.

I want to thank the wonderful testers who tested this pattern: Tonya, Cheryl, and Ashley. 

You can check out Tonya’s FB page, Wyked Crafty, here.

You can check out Chery’s FB page, Village Knits, here.


Green One Skein Wonder Front


I hope you’ve enjoyed this pattern. Like cowls? You might enjoy my Cables & Stripes Cowl, too. 🙂

Cables and Stripes Cowl


As always, much love and happy hooking!

Dianne

Izzy Neck Warmer Free Crochet Pattern

This neck warmer was inspired by a fictional book character named Izzy of the Chronicles of Izzy series by Michelle Graves. I love that series and that character, she is such an incredible woman who seriously kicks butt.

I have to add that this neck warmer was originally designed as part of a book release giveaway that was for the first book release of the Chronicles of Izzy, See How She Runs. The author asked for a original piece. This design is what I came up with. I was not paid for the design, as this was a donation on my part.

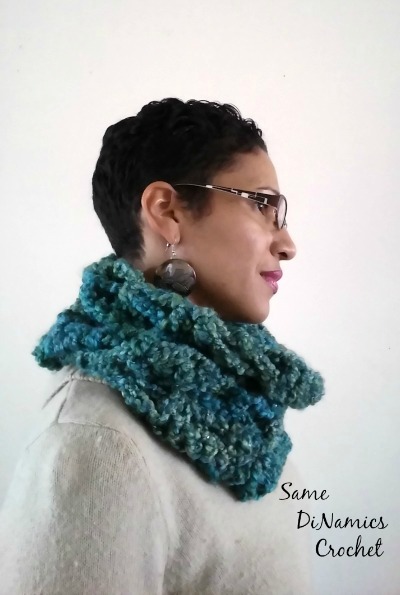
This is an incredibly simple and easy neck warmer that you can whip up in a matter of just an hour or two. It sits comfortably close to your neck and buttons up for closure. With the use of Red Heart Boutique Twilight in Lapis, the neck warmer feels soft against your skin and will provide great warmth on a blistery cold day or evening.

Izzy Neckwarmer on stand

Add Me to Your Ravelry Favorites Button

Pin me for later button

Want a PDF print version of this pattern? You can now get it for a small fee. Why a fee? While I want to provide as many free patterns for you as possible (I will have some paid patterns here and there), I’d also like to monetize my blog (I’m being honest here) and thus creating a small income for myself so that I can continue providing more free patterns.


Izzy Neck warmer

Yarn Used and Suggested:
Red Heart Boutique Twilight, #6 Super Bulky, 3.5 oz/100g, 59 yds/54m, 61% acrylic/25% nylon/9% polyester/5% metallic
Most #6 Super Bulky should work

Hook: 9mm

Notions and other materials:
Needle for weaving in ends
2″ Button – need one

Gauge:
2 rows of dc = 2”
4 dc sts = 2”

Finished Size:

22″ x 7″

Abbreviation of stitches used (US):
ch – chain; st(s) – stitch(es); sc – single crochet; dc – double crochet; FLO – front loop only; BLO – back loop only; sk – skip; rep – repeat; sp- space

Special Stitch Used:
No special stitches used

Notes:
Ch3 counts as a dc.
Ch1 counts as a sc.
The last dc is always made in both loops of your last stitch which is the turning chain from previous row.You may use more than one button and place it where you feel it fits best.

Please feel free to email me at diannevhunt@gmail.com with any questions.
Pattern:

Ch 16

Row 1: 1dc in 4th ch from hook, 1dc in each stitch across, turn, <14 dc>
Rows 2 – 3: ch3, *1dc in FLO, 1dc in BLO*, rep from * to * from 12x, 1dc in last st, turn, <14dc>
Row 4: ch3, 1dc in next 5 sts, ch2, sk 2 sts, 1dc in next 6 sts, turn, <12dc, 1 ch2 sp>
Row 5: ch3, 1dc in next 5 sts, 2dc in ch2 sp, 1dc in next 6 sts, turn <14dc>
Row 6 -7: Rep rows 2 and 3
Row 8: Rep row 4
Rows 9 – 20: Rep rows 5 – 8
Row 21: ch3, *1dc in FLO, 1dc in BLO*, rep from * to * 12x, 1dc in last st, turn, <14dc>
Row 22: ch1, 1sc in each st across, 14sc

Finish off and weave in ends.

Attach button to the center of the first dc row of the neck warmer.

Now, all you have to do is wear your neck warmer. 🙂

print a pdf copy of the pattern for a $1 Fee. You will receive a pdf copy via email from me. 

You can now print a copy of this pattern for your pattern library for a minimal fee of $1. Once you pay via PayPal, you will receive a PDF copy via email. Why a fee? While I want to provide as many free patterns for you as possible (I will have some paid patterns here and there), I’d also like to monetize my blog (I’m being honest here) and thus creating a small income for myself so that I can continue providing more free patterns.


Izzy Neckwarmer Worn

*DISCLAIMER* This post contains an Amazon link to where the book, the Chronicles of Izzy that inspired the neck warmer, can be purchased. It was not commissioned by the author.